


We’re excited to share this DIY project from Preethi, with their kind permission. See how they brought their vision to life using our Aoraki Mini-Split AC — complete with step-by-step installation, ERV setup, and even a custom-built AC cover! It might just inspire your next home upgrade.
🎥 Watch the full video here:
https://www.youtube.com/watch?v=vnS3cuePUIE
Here’s how Preethi did it — in their own words:
You know that moment when the heat gets so intense, you can't ignore it anymore? I finally caved and installed a split AC unit in my workspace and it completely changed the game. The space went from sweltering to comfortable almost instantly.
But here's the thing most people don't think about: once you’ve installed it, what do you do with the big boxy unit on your wall? I wanted something that looked as good as it worked.
So, I built a custom cover that doesn't just hide the unit, it also turns it into a design feature!

1. Indoor Unit Prep
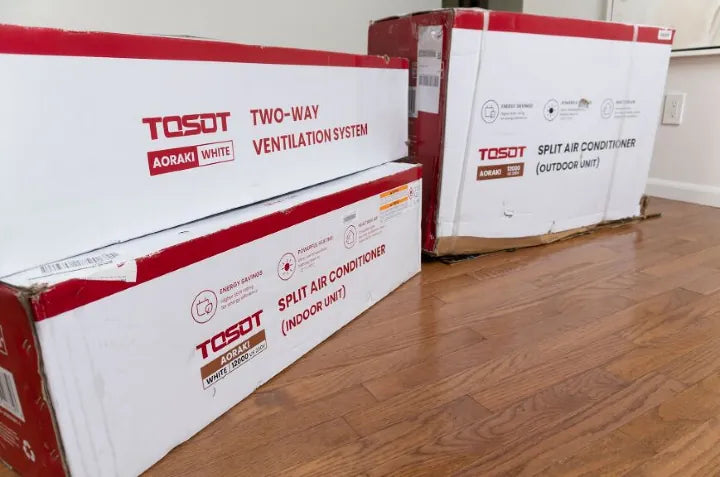
First, I tackled the install of the Aoraki Split Air Conditioner System.
This model's rated 24.5 SEER, ultra quiet (just 25 to 38 decibels), and handles extreme temperatures from -22°F to 122°F.
It came with everything: line set, R32 refrigerant, Wi-Fi control, fresh air exchange compatibility, and even a five-year warranty.
I laid the indoor unit face down to access the back panel, removed the mounting plate, and popped it right off.
Then, I flipped the unit to the front, opened the front cover, and removed the screws to the electrical panel cover and the strain relief inside that would hold the wires.
I took the signal wire that came with the unit, fished it from the back to the front, and connected it to the color-coded terminals.
Super straightforward! The manual showed exactly where each one went. After securing the cables, I reinstalled the cover.
2. Drain line and ERV wiring

On the right side of the unit, I knocked off the small hole in the bottom. This ERV came with two wires in different lengths. I picked the shorter one and connected it to the blue control wire inside the indoor unit.

On the back, the insulated drain line was connected to the left port. Since I wanted it to exit on the right, I moved the line and sealed the left opening. All lines were rerouted to exit on the rear right.
3. Refrigerant and electrical set-up
I removed the white cap on one of the tubes. It hissed, which is normal.
Then I hand-tightened the small and large pipes to their corresponding valves, using a digital torque wrench for final tightening, based on the manual’s specs.

Important: insulate each pipe connection separately!
I connected the drain line to the extension tubing, bundled all lines together, and wrapped them in the self-fusing tape provided.
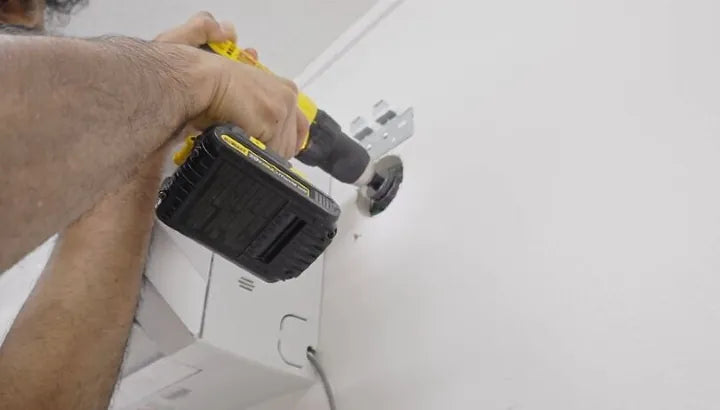
4. Wall mount and hole drilling
Using the included wall template, I marked the spot on the wall and ensured at least six inches clearance from the ceiling.
Then I measured and drilled a pilot hole at a slight downward angle for the line set, followed by a 2¾-inch hole saw.
After carefully feeding the pipe bundle through the wall with help, I sealed the cuff and mounted the indoor unit onto the plate.

5. Installing the ERV system
Mounting and connecting the ERV
I cut the ERV part from the wall template, marked the holes, and opted for two smaller pipe holes instead of one large one. After installing the ERV mounting plate, I drilled the holes with a downward angle.
On the ERV box, I connected the inlet and outlet ducts and inserted the air filter. Then, I extended the duct pipes and passed them through the wall holes. I connected the control wire from the indoor unit to the rear of the ERV.
Outdoor ERV venting
Outside, I trimmed the excess pipe length, sealed around them with silicone, and installed the outdoor vent hood. Then, I mounted the outdoor unit using a separate bracket, secured it, and connected the drain joint.


6. Wiring and power set-up
I used a line set cover to secure the wires and routed the drainage line downward through it.
For the outdoor unit, I removed the electrical panel cover. The bottom terminals connect to the power line; the top terminals connect to the indoor unit signal wire. Using the color-coded manual, I secured all the wires with clamps.
I used an electrical disconnect box powered by a 20-amp double pole breaker (230V), and connected a purchased electrical whip to the outdoor unit.
The signal wire also ran through a non-metallic whip, joining the refrigerant bundle to the indoor unit.

7. Air evacuation and final checks
I removed the cover plates, connected the refrigerant lines, and used a torque wrench per the manual.
Then I vacuumed the lines with a manifold gauge and vacuum pump. After 20 minutes, the pressure held steady, and a 10-minute wait confirmed no leaks.
I did a soapy water test. No bubbles meant success. Then I opened the liquid and gas valves and reinstalled all caps and covers.

8. Power on and features
After turning on the main power and using the remote, the unit powered up. I tested both cool and heat modes. Everything worked perfectly.
The unit also includes Wi-Fi control. I scanned the QR code, installed the app, connected it to Wi-Fi, and was good to go.

9. Ventilation and air quality
The two-way ventilation system is a standout feature. Pressing the air icon in the app activates the ERV, which pulls in fresh air and exhausts stale air, improving indoor air quality and reducing HVAC load.

10. Custom AC Cover
To hide the bulky wall unit, I built a sleek wood cover.

The sides are ¾-inch plywood; the front is made from ½-inch wood slats. I added MIRB13 fabric behind the slats to block sawdust while allowing full airflow.

It’s hung with simple hardware and fits seamlessly into my woodworking shop. No more clunky wall unit. It’s clean, cool, and looks like it belongs.
Why We Love This Project
Preethi’s workspace upgrade is a great example of how the Aoraki Mini-Split can deliver professional-grade performance — while blending beautifully into a well-designed space.
Key features:
- Ultra-quiet operation (25–38 dB)
- 24.5 SEER energy efficiency
- Wi-Fi app control & ERV compatibility
- All-in-one kit with 5-year warranty
Looking to upgrade your own workshop, office, or home studio?
👉 Explore the Aoraki Mini-Split Series
Want to Share Your DIY Story?
We love seeing how our customers creatively install and enhance their spaces with TOSOT products.
If you’ve got a project to share, tag us on Instagram or reach out directly. You might be featured next!
- Follow us on Instagram: @TOSOTDirect
- Reach us via email: support@tosotdirect.com


