Summer comes and summer goes. Labor Day has passed by, the leaves are falling, and the scent of pumpkin spice lattes is in the air. This means that autumn is here and winter is right around the corner.
In some areas in the United States, temperature and humidity levels have already started dropping over the last few weeks. When the temperature reaches 60° F, it may be time to think about putting your dehumidifier in hibernation mode for the winter.
If you are unsure if you need to keep using your dehumidifier in the winter, you can check out our guide for more information.
In general, dehumidifiers don’t require much annual maintenance. However, for long-term winter storage, a little preventive maintenance can expand the lifespan of your dehumidifier for years to come.
To keep your appliance at peak performance for next year, please follow the steps below to pack up your unit:
1. Unplug and wrap up the power
To prevent your dehumidifier from drawing any electricity during the offseason, we recommend that you unplug and wrap up the cord to prepare for storage. This can also protect your dehumidifier in case of a power surge which could damage the internal components of your unit.
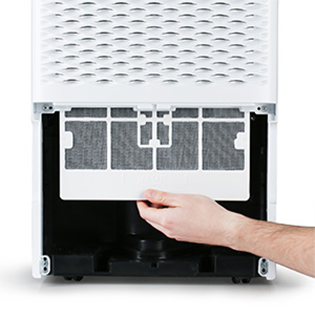
2. Clean the air filter and wipe down the outside

TOSOT dehumidifiers come with an air filter which can help trap dust and other large particles from the indoor air. Before preparing your dehumidifier for storage, it is a good idea to clean the washable filter so that your dehumidifier is ready for humidity next spring. For specific filter care instructions, check your unit’s owner’s manual. Or to learn how to wash and clean your dehumidifier’s filter, click here to watch our how-to video.
The white outer body of the dehumidifier can be wiped off with a soft, damp cloth. If there is some excess dirt on the unit, some mild detergent or dish soap can be used. Don’t use any harsh chemicals or abrasive cleaners, though!
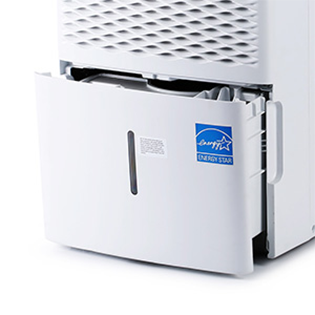
3. Empty and clean the water bucket

When continually exposed to moisture, the bucket can easily become a breeding ground for mold and mildew. You can wash it with warm water and a small amount of dish detergent (or white vinegar) to remove any sediments. Make sure the bucket is completely dry before you put it back in the machine, otherwise you may have a bucket filled with black mold spots when you get the dehumidifier ready this spring.
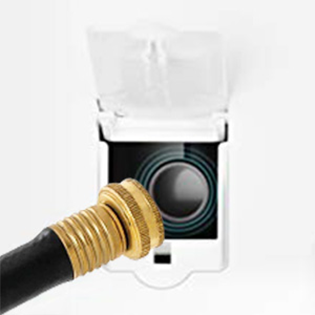
4. Remove drain hose and allow to dry

Remember to unplug the drain hose and clean the drainage port as well. This way, it can avoid any leftover waters in the machine. If you have been using the internal pump, remove that hose as well and reinsert the drain plug back into the drainage port to prevent it from getting damaged during storage.
5. Wrap or cover the unit to prevent the accumulation of dust

To protect the internal components from rust and mold, please keep the machine away from moisture and dust. If you are looking for the best way to protect your unit while in storage, consider purchasing one of our dehumidifier covers before winter rolls around. It’s even got a drawstring hem at the bottom to prevent any dust or bugs from creeping into the dehumidifier.
----------
Winter is coming. We hope the information above can offer some help as you get your dehumidifier ready for the winter. If you have any questions about getting your dehumidifier ready this winter, send us an email at support@tosotdirect.com or use the chat box to get in contact with a member of our support team. We’ll get back to you within 24 hours or less.


